Replacing a chainsaw chain is a straightforward maintenance task that typically takes 5–10 minutes. Always prioritize safety: wear heavy-duty gloves and safety glasses, ensure the chainsaw is off (remove battery for cordless/electric models or disengage for gas models), and engage the chain brake if applicable.
Safety First: What to Do Before You Start
Properly preparing for chainsaw chain replacement can prevent accidents and injuries. Taking these essential safety steps before you start ensures the process goes smoothly.
Unplug or remove battery
The first critical safety measure is making sure your chainsaw cannot suddenly start while you’re working on it. For electric chainsaws, remove the plug from the power outlet completely. If you’re using a battery-powered model, take out the battery pack entirely. With gas-powered chainsaws, turn the engine off, move the combi lever to position 0, and disconnect the spark plug cap for absolute certainty. This step is non-negotiable—a chainsaw that unexpectedly starts during maintenance could cause serious injury.
Engage the chain brake
Once your power source is disconnected, engage the chain brake as an additional safety measure. The chain brake immediately stops the rotation of the chain around the bar when activated. Modern chainsaws feature this crucial safety mechanism specifically designed to prevent accidents during maintenance. Push the handguard forward until you hear it click into position. Consequently, this locks the chain in place, providing another layer of protection while you work.
Wear gloves and eye protection
Personal protective equipment is essential whenever handling a chainsaw. At minimum, put on sturdy work gloves made from robust, cut-resistant material to protect your hands from sharp chain teeth. Eye protection is equally important—wear safety glasses or goggles to shield your eyes from potential flying debris. Although replacing a chain isn’t the same as cutting wood, protection is still necessary since you’ll be handling sharp components that could cause injury.
Work on a flat, stable surface
Lay your chainsaw on a clean, level surface where it won’t slide or tip over. Ideally, place it on a workbench or table that allows comfortable access to all parts. Having a stable platform prevents the saw from falling and potentially causing injury. Moreover, a proper workspace gives you better visibility and control during the replacement process, making it easier to align the new chain correctly.
Remember that these safety precautions aren’t optional—they’re fundamental steps that protect you from potential injuries while ensuring effective chainsaw maintenance.
Tools and Setup for Chain Replacement
Getting the right tools and replacement chain ready is crucial before starting the actual chainsaw chain replacement process. This preparation phase ensures you won’t need to interrupt your work halfway through.
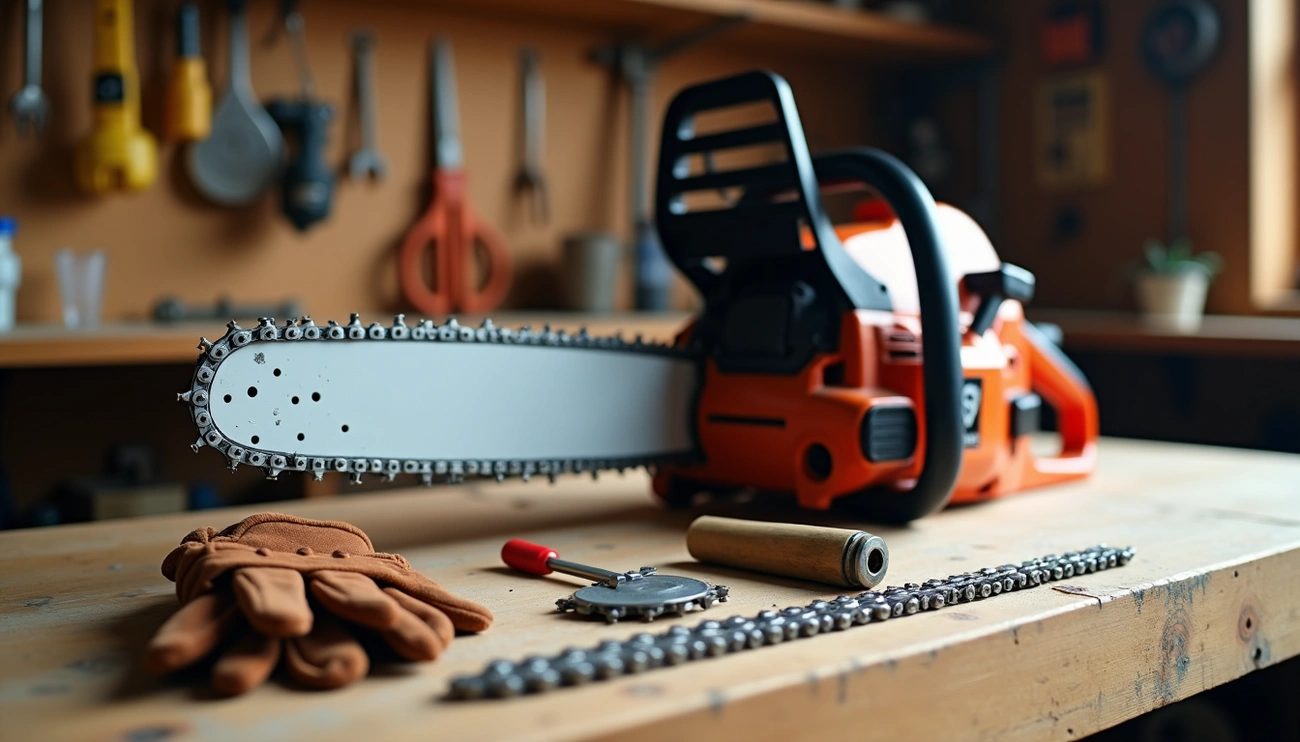
Essential tools you’ll need
Replacing a chainsaw chain requires only a few basic tools:
- Socket wrench, flathead screwdriver, or the specialized wrench that came with your saw
- Chainsaw filing kit for minor adjustments
- Gloves (which you should already be wearing from the safety steps)
Many modern chainsaws feature tool-free tensioning systems with wing nuts and thumb knobs, yet others require specific tools to loosen the sprocket cover and adjust tension. Check your chainsaw model to determine which type you have.
How to identify your chainsaw model
Beyond knowing your tools, identifying your chainsaw model is essential. The model information is typically stamped on the guide bar or listed in your owner’s manual. This information helps determine which chain specifications will work with your saw.
Some manufacturers provide online tools where you can input your model information to find compatible parts. Initially checking your manual saves time in selecting the right replacement chain.
Choosing the right replacement chain
Primarily, three measurements determine the correct replacement chain:
- Pitch – The distance between chain links, measured by finding the distance between three consecutive rivets and dividing by two. Common pitches include 1/4″, .325″, 3/8″, and .404″.
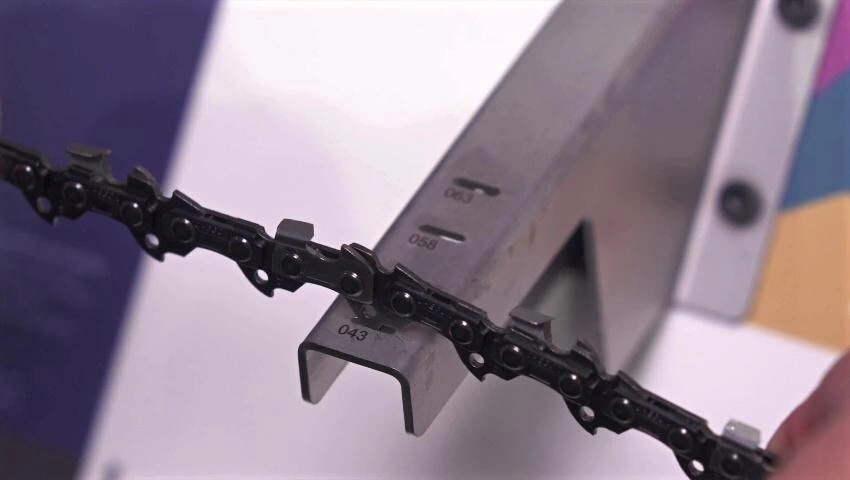
- Gage – The thickness of the drive links that fit into the guide bar groove. Standard measurements are .043″, .050″, .058″, and .063″.
- Number of drive links – Simply count all drive links (the teeth on the chain’s underside). One helpful tip: place tape on the first link, then count around.
Certainly, choosing the wrong size may result in a chain that’s either too thick to fit or too loose to gain proper traction. Therefore, having all three measurements ready before purchasing guarantees you’ll get the right replacement chain for your specific chainsaw model.
Step-by-Step: How to Replace a Chainsaw Chain
Now that you’ve prepared safely and gathered the right tools, let’s dive into the actual process of replacing your chainsaw chain.
1. Remove the sprocket cover
Locate the side panel covering the bar and chain. For models with wing nuts, fold out the handle and turn it counterclockwise until you can remove the cover. For models with standard nuts, use your socket wrench or the specialized wrench that came with your saw to loosen them. Place these fasteners somewhere safe where they won’t get lost.
2. Release the chain brake
Pull the chain brake handle toward you to disengage it. This step is necessary as the brake can interfere with proper removal and installation of the chain. On some models, releasing the brake is required before you can properly remove the sprocket cover.
3. Take off the old chain
Gently push the guide bar forward to create slack in the chain. Carefully lift the chain from the bar, starting at the top and working your way around. Watch out for the sharp teeth as you remove the old chain completely.
4. Fit the new chain on the guide bar
Place your new chain around the guide bar, ensuring the cutting teeth face the correct direction—they should point in the direction of chain rotation. Begin at the nose end, fitting the drive links into the bar groove, then work your way around.
5. Align the chain with the sprocket
Loop the chain around the sprocket, making sure the drive links interlock properly with the sprocket teeth. If positioned correctly, the chain should rotate smoothly around both the bar and sprocket.
6. Reattach the cover and secure it
Position the sprocket cover back over the bar and chain, ensuring the tensioning screw post aligns with the slot on the guide bar. Hand-tighten the nuts or wing nut, but don’t fully tighten them yet—you’ll need to adjust the tension first.
Tensioning and Testing the New Chain
Proper chain tensioning is the critical final step after replacing your chainsaw chain. Without correct tension, even the best quality chain won’t perform effectively.
How to adjust chain tension properly
Adjusting the tension involves several precise steps:
- Lift the bar tip slightly upward
- Turn the tensioning screw clockwise to tighten the chain
- Continue until the chain makes light contact with the bottom of the guide bar
- Hold the bar nose up while tightening the bar nuts
Remember to always tension the chain when it’s cool, as chains stretch when hot.
Signs of correct vs. incorrect tension
Properly tensioned chains should:
- Have drive links that remain fully seated in the bar groove
- Allow smooth movement when pulled by hand
- Snap back immediately when pulled and released
- Have no visible sag underneath the guide bar
Conversely, over-tightened chains create excess friction and strain the motor, whereas loose chains can derail during operation.
Test run and safety check
Afterward, perform these final verifications:
- Conduct the “snap test” – pull the chain downward and release; it should snap back firmly
- Perform the “rotation test” – the chain should move freely with slight resistance
- Check that fasteners are securely tightened
- Ensure the chain doesn’t move when idling
- Verify the chain brake engages and disengages properly
Owing to initial stretching, new chains require more frequent tension checks during the first half-hour of use.
Conclusion
Replacing a chainsaw chain might seem daunting at first, but as we’ve seen, the process becomes straightforward with proper guidance. Safety undoubtedly remains the foundation of this maintenance task—from disconnecting power sources to wearing protective gear. Additionally, using the right tools and selecting the correct replacement chain specifically designed for your model ensures a successful chain replacement.
Remember that proper tensioning makes all the difference between a poorly performing chainsaw and one that cuts efficiently. Therefore, take time to adjust the tension correctly and perform those essential safety checks before powering up your chainsaw again. A well-tensioned chain should snap back when pulled and move smoothly without sagging.
This basic maintenance skill ultimately saves you money on professional repairs while extending your chainsaw’s lifespan. Most importantly, your newly acquired knowledge allows you to handle this task confidently whenever your chain becomes dull or damaged.